Vyond Improvement Secrets Part 4: Using Custom Gradients for Scenes
As we knew about the content of Daniel Fuenmayor Ledesma, Conner The Sushi Packer, Kieopera, Denise Sakana and the other vyonders are known for their hardwork over beautifying content. They used awesome scenes and using gradients to improve their videos. Watch an example of Conner the Sushi Packer's Camp Animal Crossing Scene.
If we wonder if you want to add a gradient on your videos, you do it after finishing making an animation scene (adding character movements, adding character's voice, objects, adding transitions, effects, etc.) Let's do how does it works.
Methods of Using Custom Gradients for Scenes
This is an example of a fire awareness video without any gradients. This is might be a little boring like this.
Method 1
1. Open the props and search spotlight. Pick the spotlight that fades from the solid color (see in the red box)

2. Resize the spotlight, make sure that the little sense of spotlight will see the characters or objects.

3. Leave Main Titles and other objects on the front if necessary.

4. Copy the spotlight one scene (command key: ctrl+c)


6. Continue to paste on another scene the same and so on.

Not all scenes have the same spotlight, some scenes will have different colors and effects according to nature, light, darkness, weather, incident, style, etc.
But how about to change the spotlight into the different color?
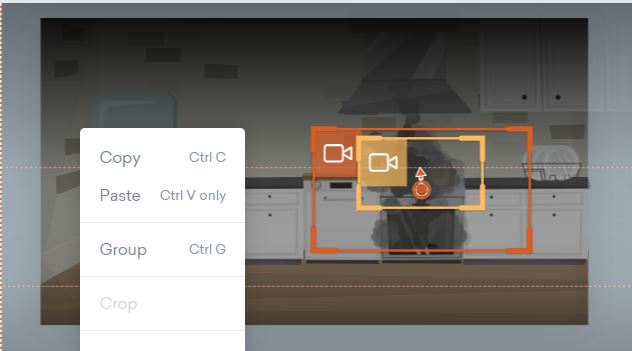
1. Copy the spotlight and paste it, make sure it has different color. Copy the different and edited spotlight shade on the same scene and rotate to 180. Slightly put down another to show the character or object. Select two scenes into one group by clicking right click and click group.

2. Copy the two spotlights conjoined together.
3. Paste it to another scene related through it. Make it darker if it is darker. I guess?

Make sure some spotlights are effects off!!
How we should changed two parts into different color and drag into another scene?
1. Copy the spotlight on one scene. (ctrl + c)

2. Paste it on the another scene that is related to it. (ctrl + v)

3. Change the colors according to the scene.

How about another one?
1. Search rectangle in the props and click the dark rectangle (not the blue one!) Resize the rectangle even bigger.

2. Copy from another scene related to it and paste (ctrl+v)


You can select all the spotlight including the transparent rectangle and copy and paste on other scenes! Do not drag somewhere else!
Tip! When you give effects to the spotlight, fade out the former one and fade in the latter one.

Now, let's watch the finished product of the video!
Method 2 (Good for Free Trial Users)
1. Open a new tab. Go your videos and search a video full of Gradients and pick one gradient
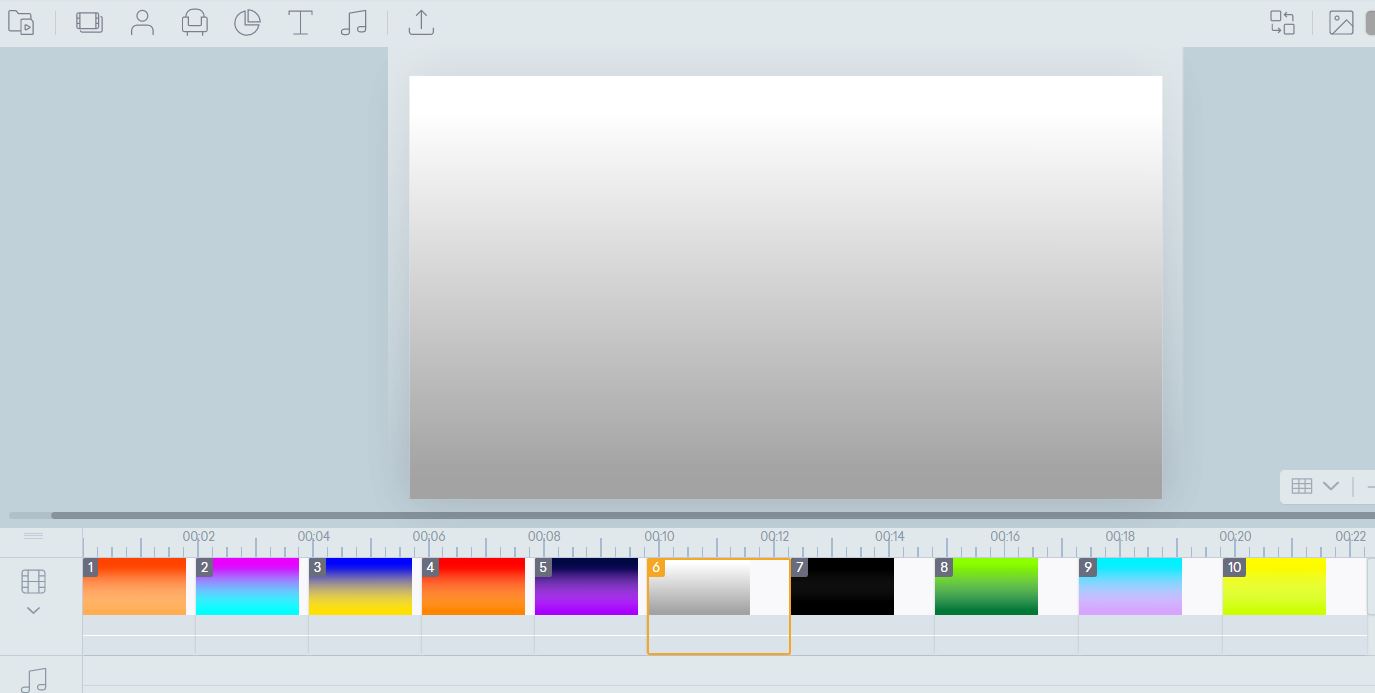
2. Copy the Gradient which you are use it and paste (ctrl + v ) on a scene in another tab.


3. Paste (ctrl+v) on other scenes as well.


Method 3
1. Go on a first scene and click right click. Click add blank scene.

2. Put the blank scene to the beginning. Right click the blank and replace.

3. Go to your library and search your custom gradients

4. If it is a group of spotlight, Go to edit group by right click. Slightly drag the brighter spotlight and copy (ctrl+c)


5. Paste it to another scene and repeat to another scene.


7. Do the same step as 4, 5 and 6 above!


8. Delete the gradient scene if you all finish adding gradients.

Other tutorials from Glyris
Tutorials by Vyond
Examples to Watch!
Other tutorials in Youtube you need to learn!


Comments
Post a Comment