Vyond Improvement Secrets Part 2: The Basics of Improving a Vyond Scene (Landscapes Edition)
Now this is the time you been waiting for, I been practice for this for a year that I watch from DFL's violy gets grounded. It also applied to my content as well, even thought it wasn't easy. In this tricky tutorial I'll show you the basics of vyond in DFL style!
Scene about Daylight
1. Open Vyond Studio. Click the icon tab and search a scene background as you like.

2. If its necessary, go to the the settings and go to the crop and select custom.

You can see the four squares on the selected background.
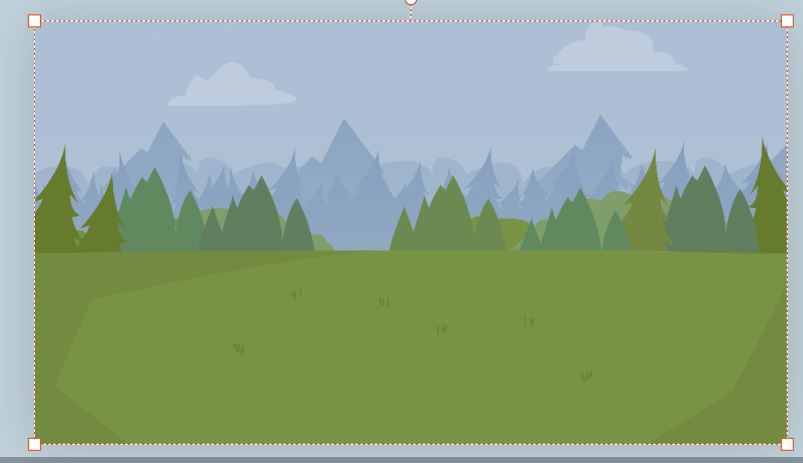
All you need to stretch the background on the right desired size the background.

3. Go to the color settings. The first box is white, which means the color of the blank background, which means hidden in another background Three other colors are the background related.

4. Let's go into the first color of the background. Let's make the grass floor even brighter since the sun shines on the grass perfectly.

5. Let's go into the color of the sky. Click the blue box and change it to brighter blue since the sun make the sky bright and clear.

6. Let's go into the color of the trees . Color the trees with the same color slightly.

Improving the Color of the Trees

2. Change dark green to bright green and do the same to the branch of the tree whereas dark brown to bright brown.


Take a look of before and after pictures. since dark color shows dull while brighter colors shows the improvement as we mentioned in the character making beforehand.


Method 1: Using Vyond Props
1.Go to props and search sun.

2. Click the sun and resize the sun and relocate it on the background.

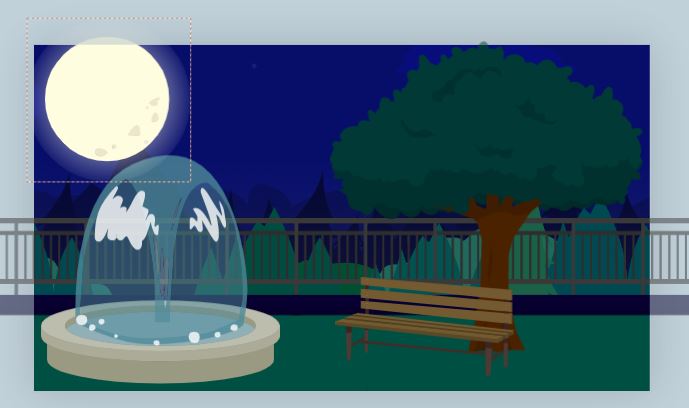
3. Search spotlight and click the spotlight background below. See in the red box that I draw it, this is a very important spotlight prop.

4. Now click the spotlight and resize the spotlight all over the background.

Now let's see some of the other ways how drag the spotlight in desired place between the background.

Using the two types of spotlights used in vyond are NOT ALIKE. The first one is too bright, and the other is slightly lighted. Thus the first one *upper one* is for backgrounds and patterns while the slightly bright one is for some miscellaneous purposes. We will talk about the gradients on the next tutorial.

Method 2: Using sources on google
1. Go to google and search "sun transparent" for example.

2. Go to color and tap transparent. Download the desired transparent picture without watermarks.

3. Click the upload button. Drag your download transparent files on Vyond upload.

4. Drag the sun in the different size and put it at the right place.

5. Click the imported transparent spotlight scene and resize the scene until the background is full.

6. Save scene and you are all done!
Scene about Nighttime
How about to change the scene that we should change it into nighttime of course? It seems that you must be careful doing to edit it into nighttime of course.
1. Select the save scene and delete spotlights EXCEPT THE SUN!!!

2. Go to second box and change the color into darker color (I'll use teal color)


3. Change the sky into Dark Blue (aka Midnight Blue)

4. Change the color of the forest into Darker teal.

5. Change the leaves with the tree into darker color (dark teal) which is make too darker color than the rest of grass and forest.

6. Make the branch even darker brown...

Editing colors on grouped props.
1. Select the grouped props (the fences,) click right button and click edit group.

2. Press Control or shift while click all the parts of the group.

3. Change the grills' color to black or dark gray.

4.Change the color of the sidewalk into darker color (dark gray)

Yey, we are halfway done with the scene!
Replacing the sun into the moon
1. Click right click of the sun and select replace.

2.Click props and Search moon. Click the moon as I mentioned the red box.

3. Resize the Moon.

5. Drag and fit the transparent rectangle. I just move backward to let the moon in the front, thus this is an example.

6. Go to props and click the spotlight

7.Now resize the spotlight until became full into the background. Now change the color of the spotlight into brighter dark violet or deep blue.

8. Add lower lights if necessary, it shows reflection of a light by just copy the spotlight and paste it (Ctrl+V). Change the color of the lower light into yellow and rotate into 180 degrees.

The night scene is all done!!

Other examples you may try!


Other tutorials from Glyris
Tutorials by Vyond
Examples to Watch!
Other tutorials in Youtube you need to learn!


Comments
Post a Comment